
Git
This page describes how to use git to manage the BaseX sources.
Contribute to BaseX
Our team uses git and GitHub to manage the source code. All team members have read/write access to the repository, and external contributors are welcome to fork the project.
Git makes it easy to retain a full copy of the repository for yourself. To get started and running, simply fork BaseX:
- Head over to https://github.com and create an account
- Fork https://github.com/BaseXdb/basex, so you have a version on your own
- The forked project can then be cloned on your local machine, and changes can be pushed back to your remote repository.
Using Git & Eclipse
Clone
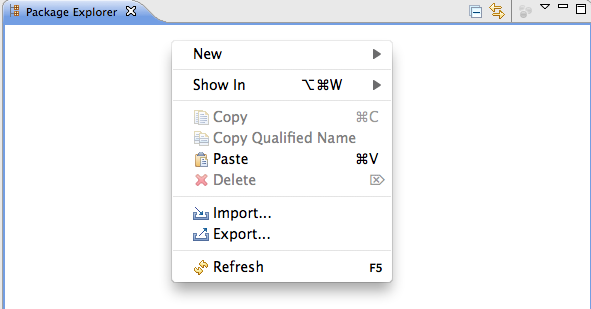
- In the Package Explorer to the left, use right-click and choose Import…
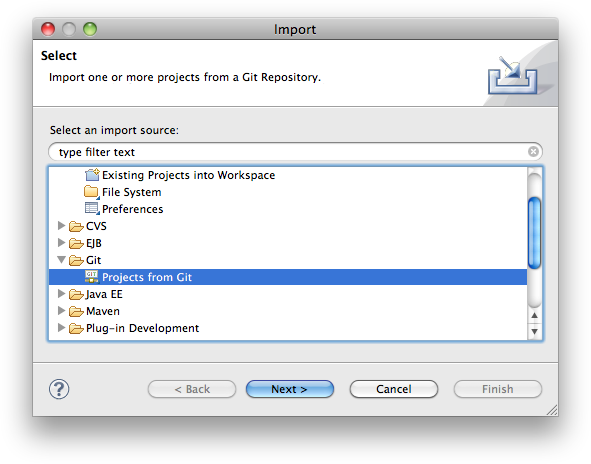
- Select Projects from Git and click Next
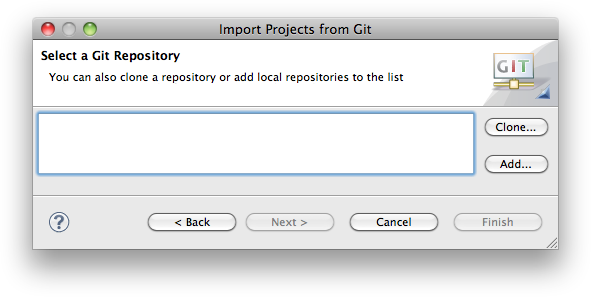
- Choose the Clone option to create a local copy of the remote repository. This copy will include the full project history
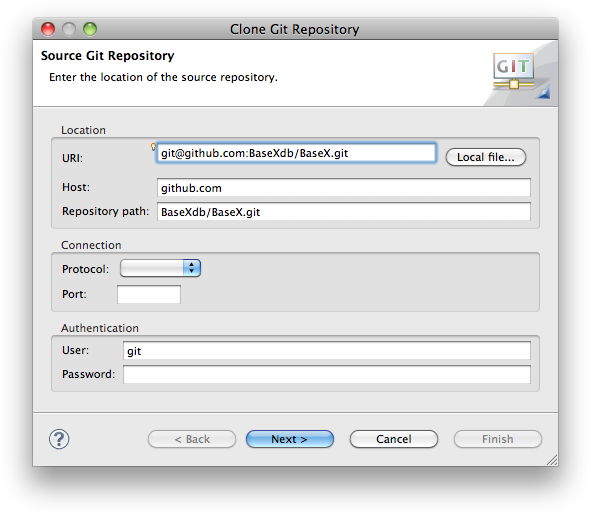
- Copy & Paste the GitHub URI in the Location field. If you want to use SSH, make sure you provided GitHub with your public key to allow write-access. If in doubt, use the
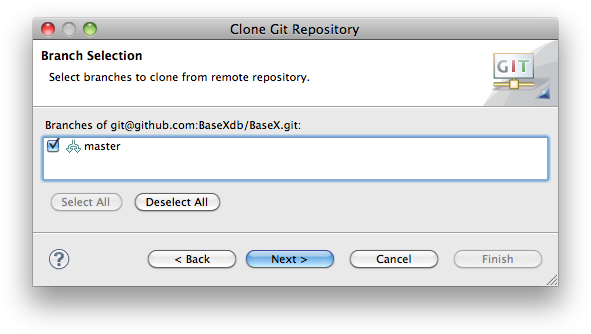
httpsURI and authenticate yourself with your GitHub credentials. The read-only URI of the repository ishttps://github.com/BaseXdb/basex.git. - Select the main branch (or arbitrary branches you like)
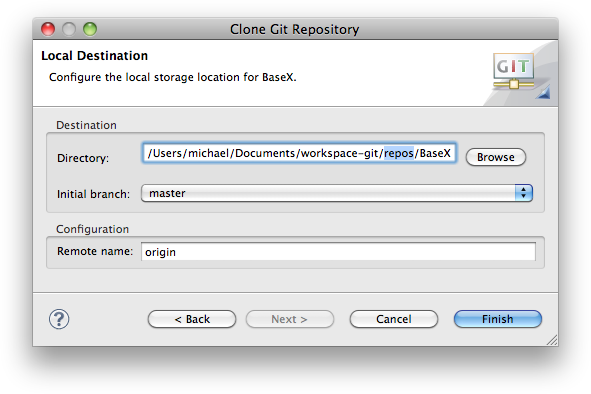
- Now pick a location where the local repository is stored: Create
<workspace>/repos/BaseXand click “Finish”.
Create the project
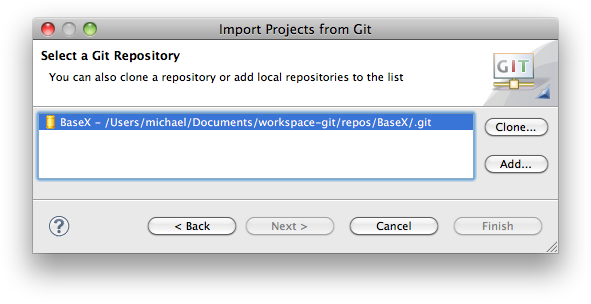
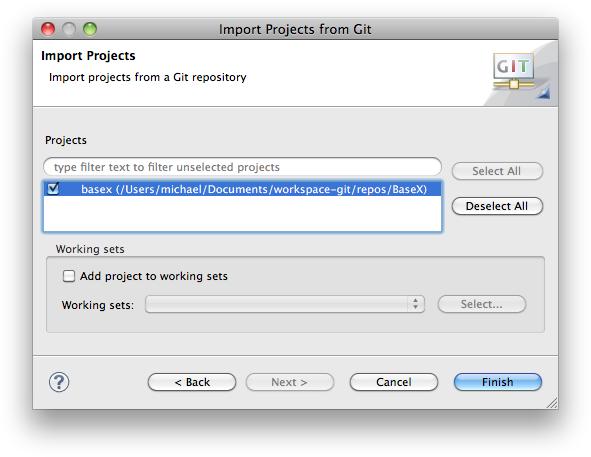
- Select our newly cloned repository and click Next
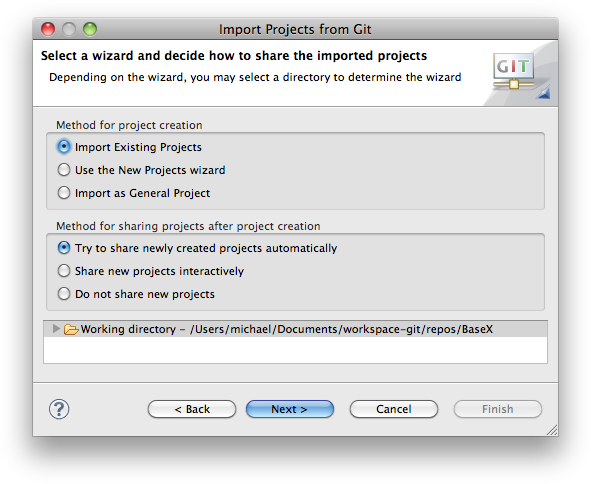
- Select “Import Existing Projects” and depending on your Eclipse version enable automatic sharing. More recent versions will not offer this feature, as sharing is enabled by default.
- Click next to select the Project to import
- Check “basex” to check out and click finish
- You are now ready to contribute.
Git on Command-Line
Note: this is not intended to be a complete git reference; its purpose is to quickly introduce BaseX developers to the most commonly used git commands in the context of the BaseX project.Preparation
- Create a GitHub user account: here (your GitHub username will be referenced as
$username) - Set up SSH access to GitHub as described here
- Create a fork of one of the
BaseXdbprojects (it will be referenced as$project) - Choose a directory where the project will be created and make it your working directory (e.g.,
/home/user/myprojects)
Clone Repository
$ git clone git@github.com:$username/$project.git
Cloning into $project...
Enter passphrase for key '/home/user/.ssh/id_rsa':
...

$ ls -d -1 $PWD/*
/home/user/myprojects/$project
Note that git automatically creates a directory where the repository content will be checked out.
List Remote Repositories
$ git remote -v
origin  git@github.com:$username/$project.git (fetch)
origin  git@github.com:$username/$project.git (push)
Currently, there is only one remote repository; it is automatically registered during the clone operation. Git remembers this repository as the default repository for push/pull operations.
List Local Changes
After some files have been changed locally, the changes can be seen as follows:
$ git diff
diff --git a/readme.txt b/readme.txt
index fabaeaa..cd09568 100644
--- a/readme.txt
+++ b/readme.txt
@@ -49,6 +49,10 @@ ADDING CHECKSTYLE --------------------------------------------
  - Enter the URL: http://eclipse-cs.sourceforge.net/update
  - Follow the installation procedure and restart Eclipse

+USING GIT ----------------------------------------------------------------------

  Any kind of feedback is welcome; please check out the online documentation at
Local commits
Note: this commit operation does not commit into the remote repository!First, it is needed to select the modified files which should be committed:
$ git add readme.txtThen perform the actual commit:
$ git commit
[0fde1fb](main) Added note in section "USING GIT"
 1 files changed, 4 insertions(+), 0 deletions(-)
Before executing the actual commit, git will open the default shell editor (determined using the $EDITOR variable, usually vi) to enter a message describing the commit changes.
Alternative way is to commit all changed files, i.e., it is not needed to explicitly add the changed files:
$ git commit -a
[0fde1fb](main) Added note in section "USING GIT"
 1 files changed, 4 insertions(+), 0 deletions(-)
Pushing Changes
$ git push
Enter passphrase for key '/home/user/.ssh/id_rsa':
Everything up-to-date
Pulling Changes
$ git pull
Enter passphrase for key '/home/user/.ssh/id_rsa':
Already up-to-date.
Add Upstream Repository
The upstream repository is the one from which the BaseX releases are made and the one from which the personal repository was forked.
$ git remote add upstream git@github.com:BaseXdb/$project.git

$ git remote -v
origin  git@github.com:$username/$project.git (fetch)
origin  git@github.com:$username/$project.git (push)
upstream        git@github.com:BaseXdb/$project.git (fetch)
upstream        git@github.com:BaseXdb/$project.git (push)
Pulling Upstream Changes
When some changes are made in the upstream repository, they can be pulled to the local repository as follows:
$ git pull upstream main
Enter passphrase for key '/home/user/.ssh/id_rsa':
From github.com:BaseXdb/$project
 * branch            main     -> FETCH_HEAD
Aready up-to-date.$ git pushCheck out the links at the end of the page for more git options.
New Features
It is always a good idea to create a new branch for a new feature or a big fix you are working on. So first, let’s make sure you have the most up-to-date source code. We assume, that you added BaseX as upstream repository as described above, and you are currently in the main branch:
$ git pull upstream mainNow, we create a new branch, based on the main branch
$ git checkout -b new-feature
Switched to a new branch 'new-feature'
You are now automatically switched to the new-feature branch. Now you can make all your changes in one or several commits. You can commit all changes using
$ git commit -aNow, you want to push these changes to the repository on GitHub. Remember, that up to now your changes just reside on your local drive, so now you want to push it to your remote fork of BaseX. Simply do:
$ git push origin new-feature
Counting objects: 318, done.
Delta compression using up to 4 threads.
Compressing objects: 100% (107/107), done.
Writing objects: 100% (154/154), 22.96 KiB | 0 bytes/s, done.
Total 154 (delta 93), reused 81 (delta 26)
To git@github.com:$username/basex.git
 * [new branch]      new-feature -> new-feature
You can now use your web browser and go to your fork of BaseX. You will see the following message:
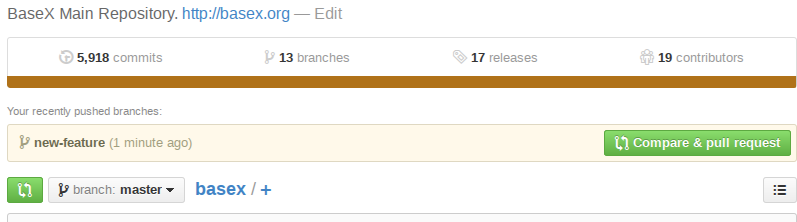
You can now click the “Compare & pull request” button. You can now review the changes you are going to push.
Please review them carefully. Also, please give a meaningful comment so we can quickly determine what your changes are doing. After clicking the “Create Pull request” button, you are done, and we will review your changes and either merge the pull request or get back to you.