
Main Page » Getting Started » Integrating IntelliJ IDEA
Integrating IntelliJ IDEA
This article describes how to run XQuery code from within the IntelliJ IDEA IDE with the XQuery and XSLT plugin (xquery-intellij-plugin) by Reece H. Dunn. The plugin offers syntax highlighting, code completion and error detection, and it runs queries with BaseX, either as client of a BaseX server or as standalone instance.
Note: The XQuery Support plugin by Grzegorz Ligas is no longer maintained: its last version supports IntelliJ IDEA 2019.1. We also encourage you to use the editor of the BaseX GUI, which supports all features of XQuery 4.0 and BaseX.
Preparations
- Install IntelliJ IDEA (the free or the commercial edition).
- Download a BaseX distribution.
- If queries are to be run on a BaseX server, start a Database Server: either
basexserver, orbasexhttpwith-L(see Startup).
Installation
- Download the XQuery and XSLT plugin archive file.
- Open the Plugins section of the Settings dialog: File → Plugins…, or Plugins on the welcome screen.
- Click the settings icon in the upper right corner and select the option Install Plugin from Disk.
- Browse to the plugin archive file, select it and click OK.
- Click OK to apply the changes and restart IntelliJ IDEA if you are prompted to do so.
Configuration
XQuery Settings
- In the IntelliJ IDEA → Settings dialog, select Languages & Frameworks → XQuery.
- Choose the following values:
Field Value Implementation BaseXImplementation version The most recent BaseX version offered by the plugin Default XQuery version The most recent XQuery version offered by the plugin Dialects BaseX - Click OK.
Query Processor
- Select Run → Edit Configurations…, then Edit configuration templates… and the XQuery template.
- Click the
…button next to Query Processor, and add a new processor with+:
If Standalone instance is checked, queries are run by an embedded BaseX instance, and the connection fields remain empty. If queries are to be run on a BaseX server (started withField Value Description BaseX(optional)Implementation BaseXJAR File The BaseX.jarfile of your distributionbasexserver, orbasexhttp), check Server Instance instead:Field Value Hostname, Database port localhost,1984Username, Password The credentials of a BaseX user - Select the new processor in the Manage Query Processors dialog, and close all dialogs with OK.
Running Queries
- Create a project, e.g. with File → New → Project… and Empty Project.
- Create a query file in the project view (New → File, e.g.
query.xq), enter a query, e.g.db:get('factbook'), and save it. - Select Run → Edit Configurations…, click
+and choose XQuery. - Enter a name, check that the BaseX processor is selected, and choose under Run the query from either the query file (Local file) or Active editor file. Click OK.
- Run the query with Run → Run (Shift F10). If the processor is a client, the BaseX server must be running.
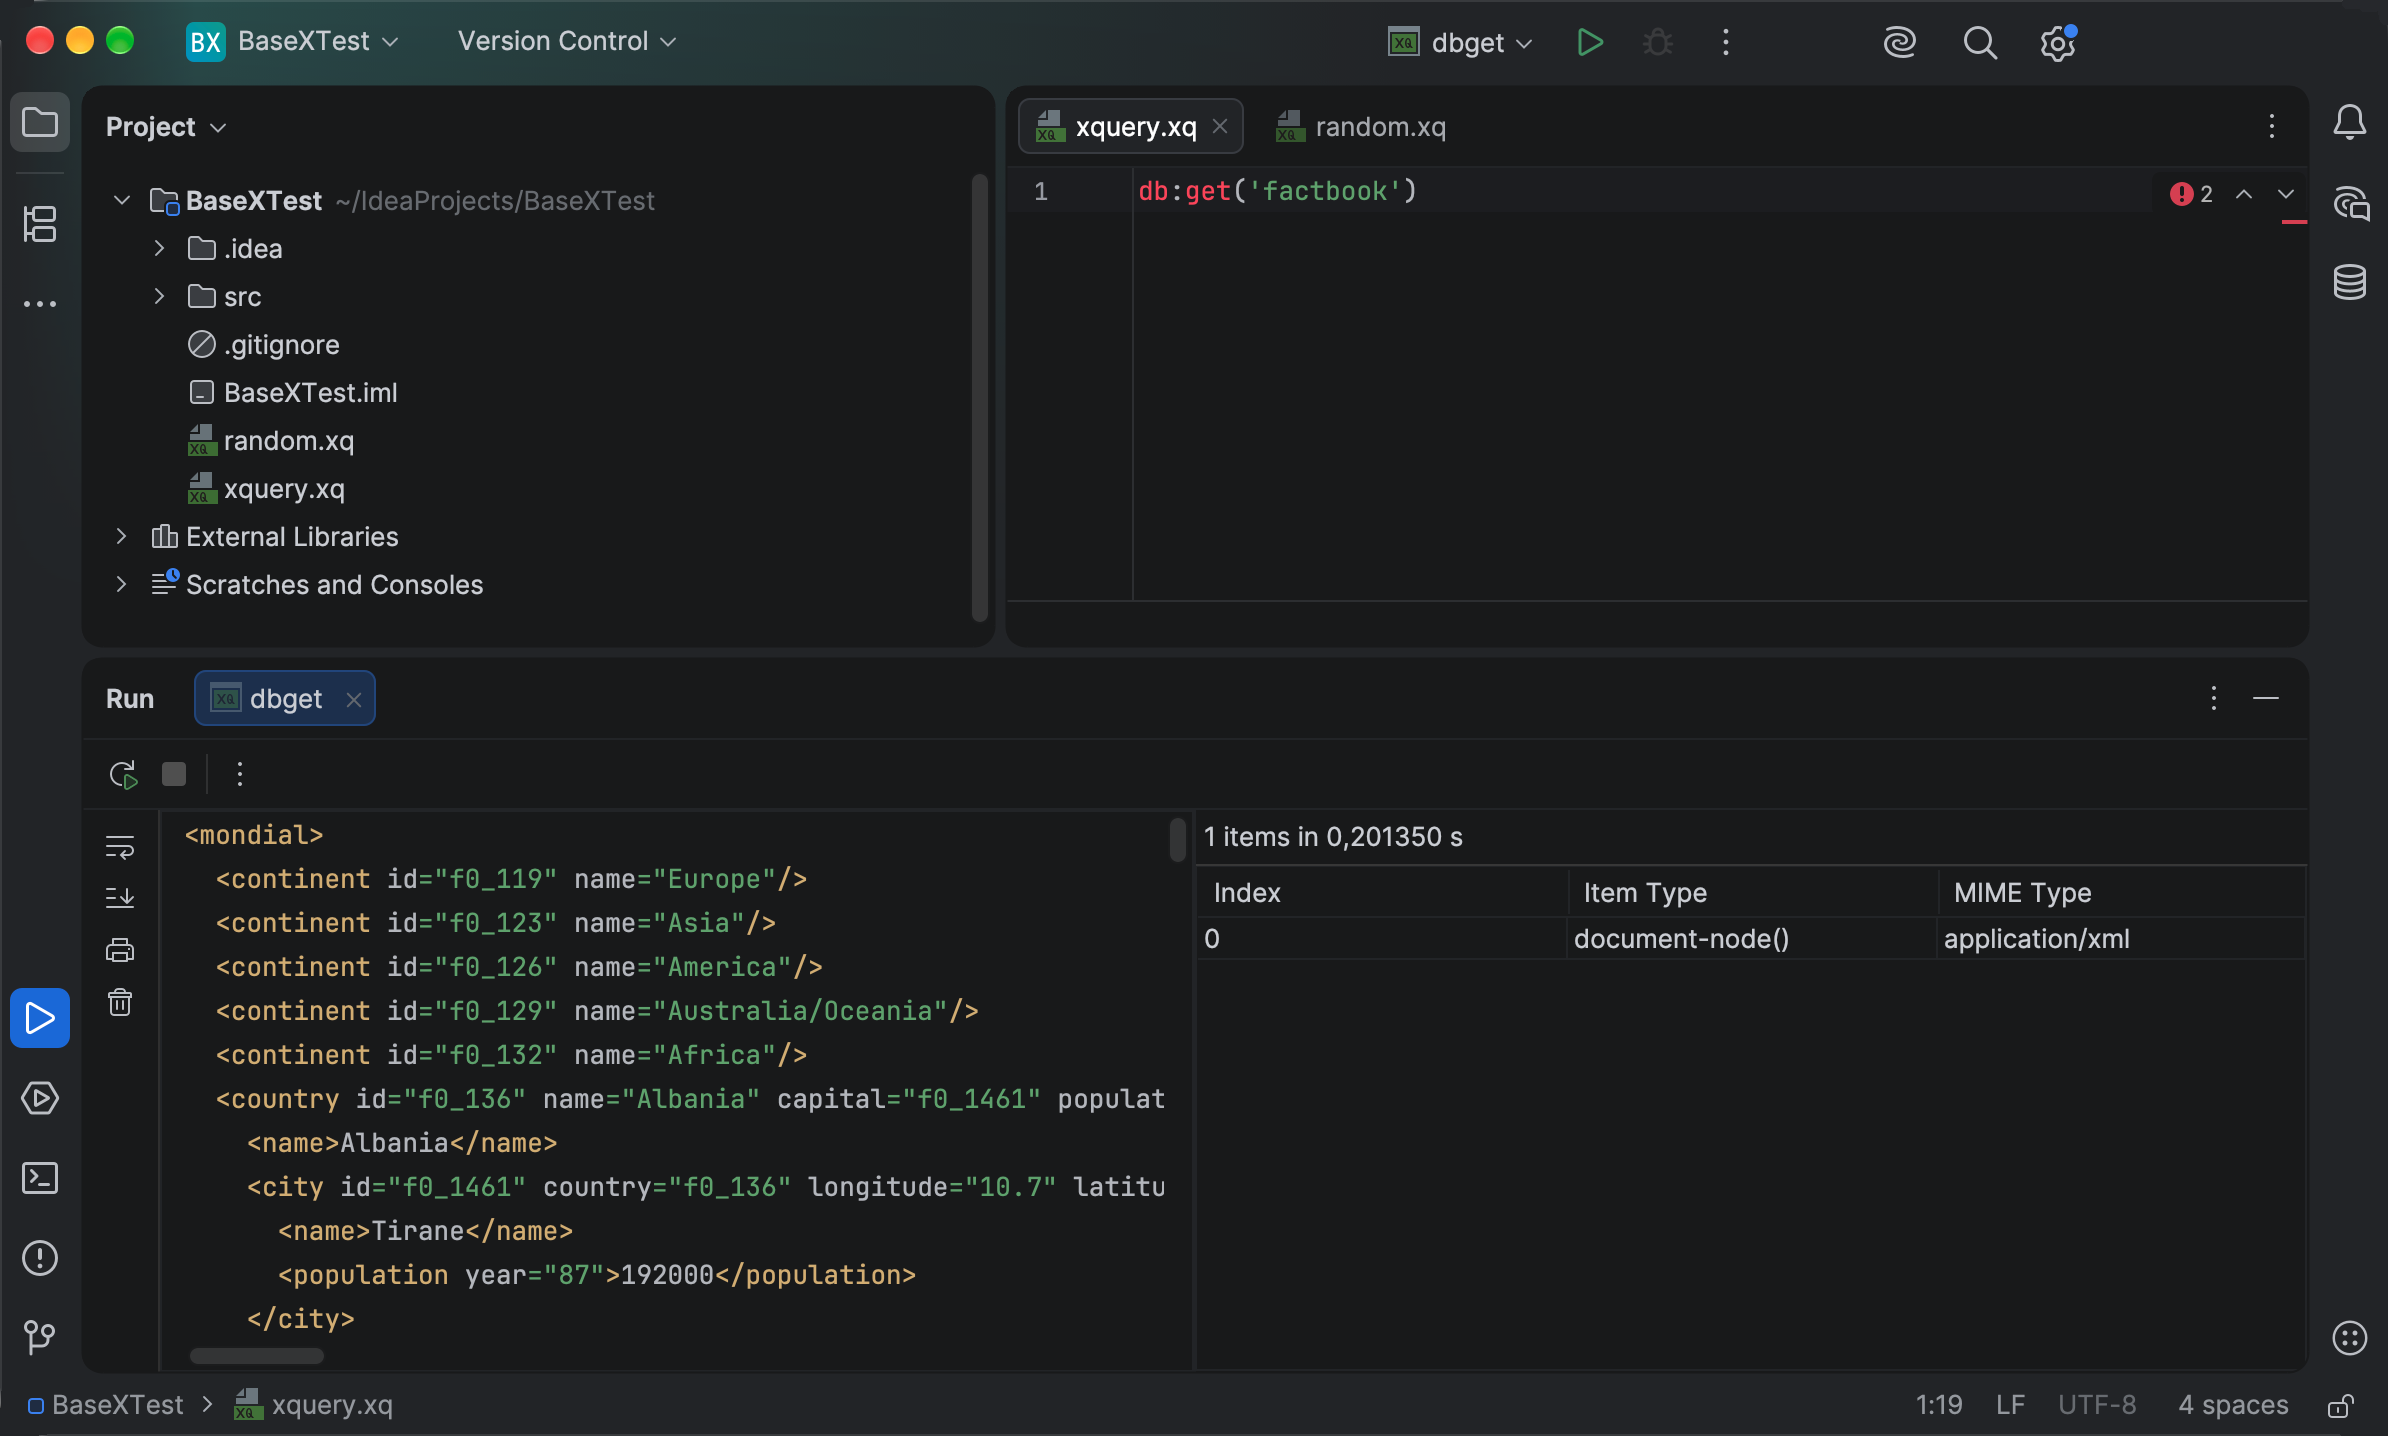
The database log of the server can be displayed with the Query Log button in the lower right corner of the project window.
⚡Generated with XQuery